We prefer computers because of their speed and the ability to store data.
How can we save data and information on a computer?
We can save them in folders that accommodate multiple files or a single file.
Let us understand the terminologies like file and folder before we move further.
File:
The output we obtain from any application is generally called ‘file’. Therefore, the application for particular purposes determines the nature of the file.
Folder:
A folder is a storage space that includes multiple files. We can create files as per the needs of the user’s.
When we right-click on the mouse, the popup menu appears on the screen with multiple options.
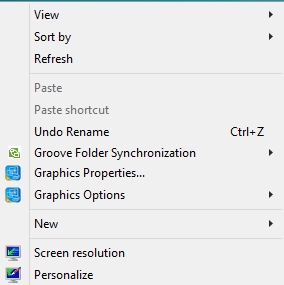
Pop up menu
Select the ‘NEW’ option, and a secondary menu comes up with another set of options.
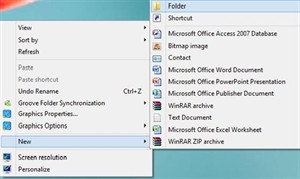
New folder
Select the ‘Folder’ option in the menu. You can now directly save your file(s) in the newly created folder.
We can type our notes in 'Notepad' and save the created files in a folder as per their name.
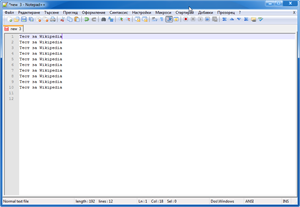
Notepad
Likewise, we can draw and edit pictures in the' Paint' app. Let us see how to use these images to create image galleries, animations, and graphics.
Pictures and audio-visuals give us more understanding than teaching and writing on the blackboard. Is it right? The device that helps explain the concepts easily through pictures is called the 'Visual Communication Device'.
For example, photos, audio-visuals, drawings, animations all can be created easily with the help of the computer. Cinema is an excellent example of a 'Visual Communication' device.
Programming is defined as the art of writing instructions to communicate to a computer what to do. A set of instructions is known as a program. The instructions are communicated in what is known as a programming language, and there are thousands of such languages.
Scratch is software used to create animations, cartoons, and games easily. On the other hand, Scratch is a visual programming tool.
Scratch software
It was invented in the Massachusetts Institute of Technology (MIT) Media Lab to make programming easier and more fun to learn.
It promotes computational thinking and problem-solving skills, innovative teaching and learning, self-expression and collaboration and equity in computing. It is always free and is available in more than 70 languages.
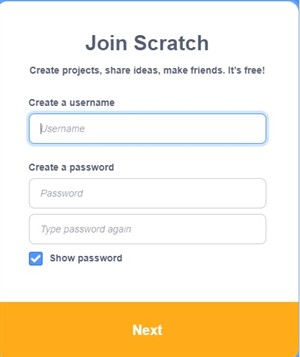
We recommend you create an account for the Scratch website. Here’s how:
- Open a web browser, such as Google Chrome.
- Enter the website address http://scratch.mit.edu/in your address bar, usually at the top of the screen.
Scratch
- Click Join Scratch in the top-right.
- Make up a username.
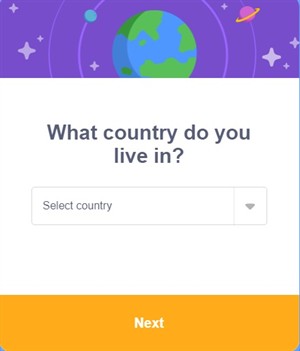
Details for joining
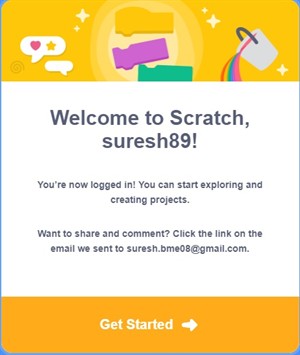
Joining scratch
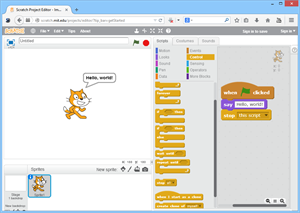
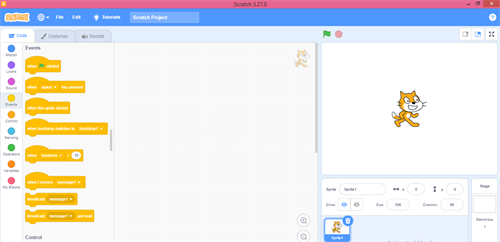
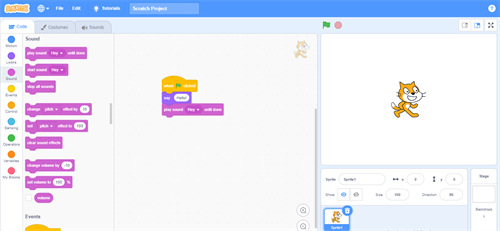
The Scratch editor is the space where you snap code blocks together to make your animation, game, or artwork. The Create link will be at the top of the page, enabling you to open the editor (as shown in the figure below) so you can start creating Scratch programs.
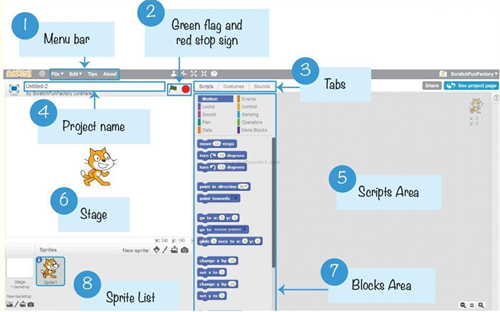
Sprite and script
Each sprite has its own script. When you click the sprite available in the Sprite List, Scripts Area will show the sprite's scripts. Choose the Scripts tab to show the Scripts Area. Paint Editor replaces the Scripts Area and Sound Editor when the Costumes and Sounds tabs are chosen, respectively.
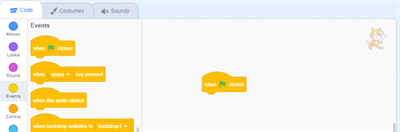
Clicking the green flag will start your program, and clicking the red stop sign will stop it.
Clicking the green flag will start your program, and clicking the red stop sign will stop it.
The Scratch editor has three main parts. They are Stage, Sprite and Script editor.
Stage:
The stage is the background appearing when we open the scratch window. The background will most often be white. You can change the background colour as you like.
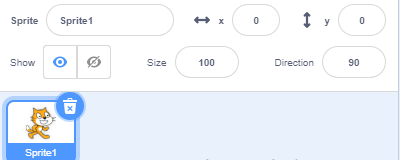
Sprite:
The characters in the background of a scratch window are known as sprite. Usually, acat appears as a sprite when the Scratch window is opened. The software provides facilities to make alternations in Sprite.
Script editor / costume editor:
This is the area where you edit your programs or your Sprite’s pictures.
The script editor has three main parts:
-
Script area: Where you build scripts.
-
Block menu: Where you choose the category of blocks (programming statements) to use.
-
Block palette: Where you choose the block to use.
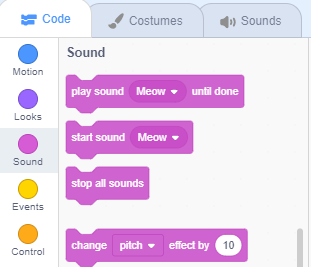
Adding Sound:
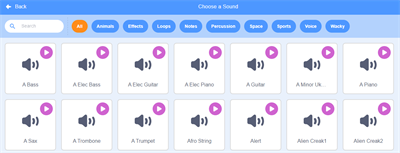
- Select Sprite1 in the sprite list and click the Sounds tab.
Sound menu
Try the meow sound already there in the list. Click the speaker icon to select a different sound from the sound library if you don't like the default sound

Adding sound
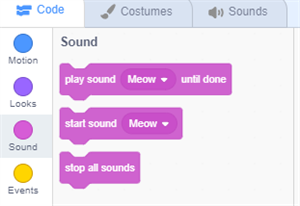
Click the Scripts tab and select the play sound block from the Sound menu. Drag and add this block to the when space key pressed script.
Adding sound
Movement and Loops:
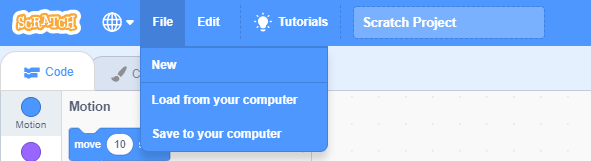
- Click the File/New menu to create a new project and enter a project name.
Movement and Loops
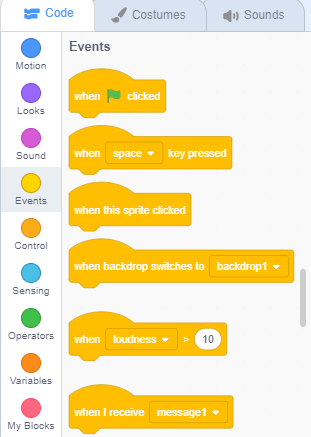
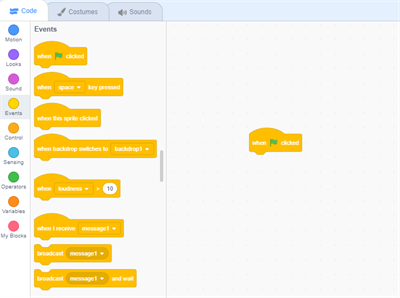
- Click the Script menu → Event, drag and place a "when green flag clicked" block to the scripts area.
Movement and Loops
- Click the Script menu → Motion menu, drag and place a goto x:0 y:0 block to the scripts area and place it to the bottom of the "when green flag clicked" block.
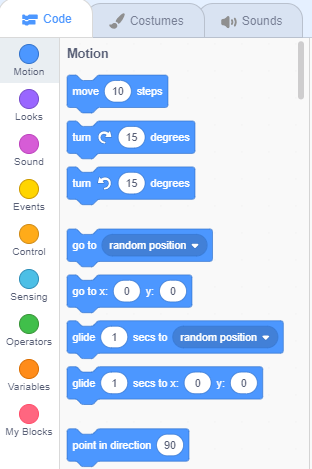
- Drag and place a move \(10\) steps block to the bottom of your script and modify the \(10 into 100\).

Movement and Loops
In this section, we will discuss the program to print the word with sound.
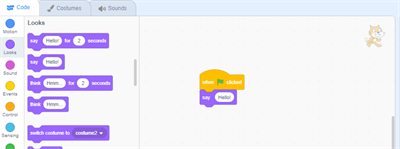
Procedure for printing the word “Hello” with sound:
- Select events in the script option
word with sound
- Drag tab when green flag clicked to the script area
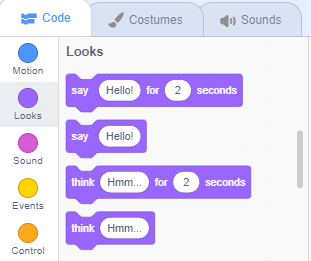
- Select Looks in the script option. Drag “say” to the script area.
word with sound
Type the word “Hello“ in the 'say' tab.
word with sound
- Select sounds in the script option. Drag and place play sound to script area. Select the hello sound from the audio file.
word with sound
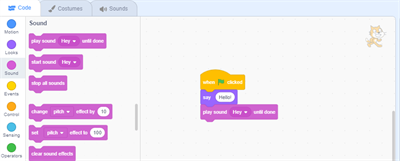
word with sound
- To run the program, click the green flag at the top right corner of the stage window.
word with sound