The next morning, while looking at an old photograph, Luke asked, “Mom, how does light help us take pictures?”
She smiled and showed him a small box with a tiny hole. “Long ago, people used simple boxes like this. Light entered through a tiny opening and formed an image inside, just like how cameras work even today.”
She smiled and showed him a small box with a tiny hole. “Long ago, people used simple boxes like this. Light entered through a tiny opening and formed an image inside, just like how cameras work even today.”
Let us understand it with the help of an activity.
Activity: To observe the image formed on a screen through a pinhole.
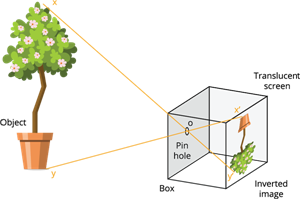
Image of a plant observed through a pinhole
Step 1: Take a cardboard sheet and carefully make a very small pinhole at its center.
Step 2: Place the cardboard upright so that it stands between the object (such as the plant shown in the image) and the screen.
Step 3: Keep the room dim so that outside light does not interfere.
Step 4: Position the object in front of the pinhole, ensuring that the light from its top (marked x) and bottom (marked y) can reach the hole.
Step 5: Place the screen on the other side of the cardboard, a short distance away, as shown in the picture.
Step 6: Look at the screen carefully.
Observation:
- You will see a clear image of the object (plant) appearing on the screen.
- However, the image is upside down; the top of the plant appears at the bottom on the screen, and the bottom part appears at the top.
- This is because light rays coming from the top (\(x\)) travel through the pinhole and reach the lower part of the screen, while rays from the bottom (\(y\)) travel upwards.
Conclusion:
A pinhole allows only a small set of light rays to pass through. Because these rays cross each other at the pinhole, they form an inverted image on the screen.
This activity shows that light travels in straight lines, and when restricted by a tiny opening, it creates a real, inverted image of the object placed in front of it.
Construction of a pinhole camera:
Activity: To construct a pinhole camera.
Step 1: Take two cardboard boxes where the smaller one fits inside the larger one.
Step 2: Cut one side of both boxes open.
Step 3: Make a small pinhole on the opposite side of the larger box.
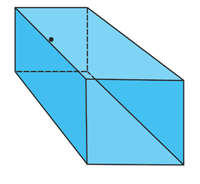
A larger box with a small pinhole
Step 4: Cut a \(5\)–\(6\) cm square on the opposite side of the smaller box and cover it with tracing paper to form a screen.
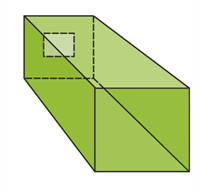
A smaller box with tracing paper
Step 5: Slide the smaller box into the larger one with the tracing paper facing the pinhole.
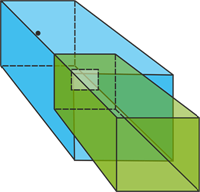
The smaller box slid inside the larger box
Step 6: Point the pinhole toward a bright distant object.
Step 7: Cover your head and the open end of the camera with a dark cloth.
Step 8: Move the inner box forward or backward until a clear image appears on the tracing paper.
Observation:
- A visible image of the distant object appears on the tracing paper screen.
- The image shows the colors of the object, though they look slightly dim or less bright due to the small amount of light entering through the pinhole.
- The image formed is inverted (upside down) compared to the real object.
Conclusion:
- This activity shows how a pinhole camera works.
- Light entering through a very small hole travels in straight lines and forms an inverted, real image on the screen.
- The image retains the color of the object but appears faint.
- The movement of the inner box changes the distance between the pinhole and the screen, helping to bring the image into focus.
Pinhole camera:
A pinhole camera is a simple device that forms an image by allowing light to enter through a tiny hole. The light travels in straight lines, and because it passes through the small opening, it creates a real, inverted image of the object on the screen inside the camera. It does not use any lens.
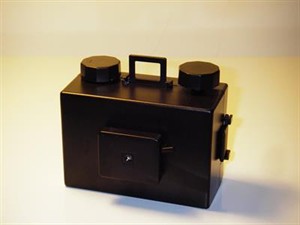
Vintage pinhole camera
Periscope:
A periscope is an optical device that uses two plane mirrors to help us see objects that cannot be seen directly because they are blocked from view.
How to make a periscope?
- Make a Z-shaped box.
- Fix two plane mirrors inside the box at \(45°\) angles, as shown in the figure.
- Light reflects from the first mirror to the second, and then to the viewer’s eyes.
- It forms a single clear image of the object.
- The formed image is virtual and erect.
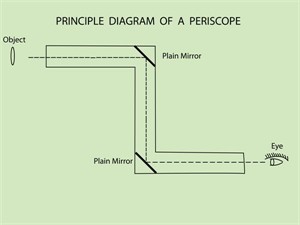
Periscope
Uses:
- Used in submarines to see above the water.
- Used in tanks and bunkers by soldiers to see outside safely.
- Can be used by a person to see over tall objects or over taller people.

A submarine with a periscope
Kaleidoscope:
A kaleidoscope is an instrument that uses three mirrors to create beautiful and changing patterns from repeated reflections.
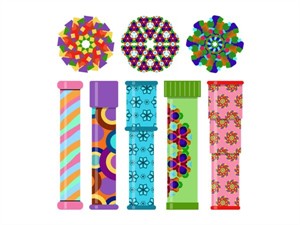
Kaleidoscopes
How to make a kaleidoscope?
- Join three rectangular plane mirrors into a triangular shape.
- Place them inside a cylindrical tube made of thick chart paper.
- Fix a transparent plastic sheet on one end.
- Place small pieces of coloured bangles or beads on the sheet.
- Cover these pieces with tracing paper.
- Look through the open end to see the patterns.
- It forms multiple repeated and symmetrical images.
- The formed images are virtual and colourful patterns.
Construction of a kaleidoscope
Uses:
- Produces colourful, changing patterns used for fun and creativity.
- Helps designers and artists get ideas for new patterns.
- Shows how multiple reflections (reflections of reflections) can form repeated designs.
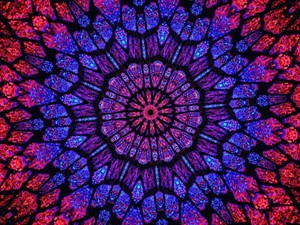
Patterns formed by a kaleidoscope
Important!
A pinhole camera forms an inverted image. But a mirror produces lateral inversion, meaning left and right are reversed, but the image is not upside down.